|
|
|
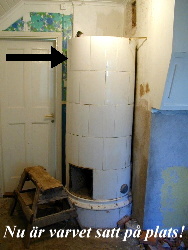
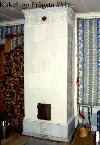
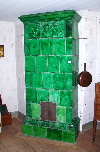
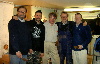
We are setting up a Swedish ceramic stove! |
|
|
|
WeTiFu |
|
by Valter Pettersson
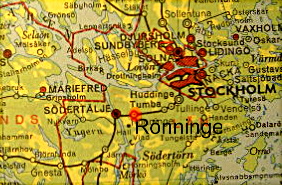
Isander, Rönninge, Sweden |
|
WeBeKå |
Follow us
when we are setting up an old Swedish ceramic stove!
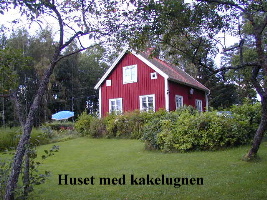
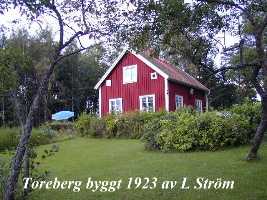
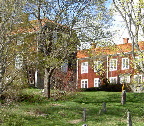
In Stjärnhov in Sweden David has a nice house from the early 1900:th,
and there is room for a ceramic stove in a corner.
Well - in February 2000 the work has begun- you can see how it's progressing
in text and pictures.
Join us in mailing and encouraging us, and ask us and give us feedback!
Remember ... we don't know yet how to do it... maybe afterwards...
Visit us in Rönninge (Stockholm) to see and learn about Kakelugnar! - (follow this link)
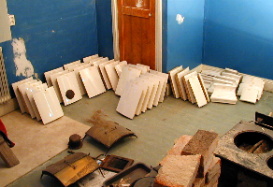
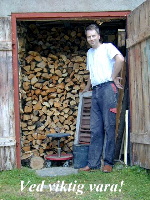
1 - We are preparing
We buy a ceramic stove in pieces,
transports it, carries heavy things.
Checking that the chimney is OK, that it will accept firing with wood, that
the floor is strong enough for 1000 kg, etc.
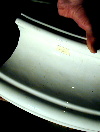
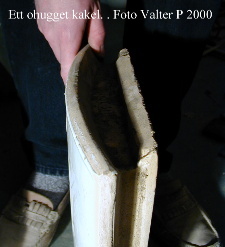
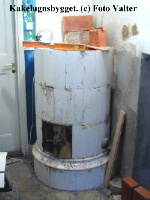
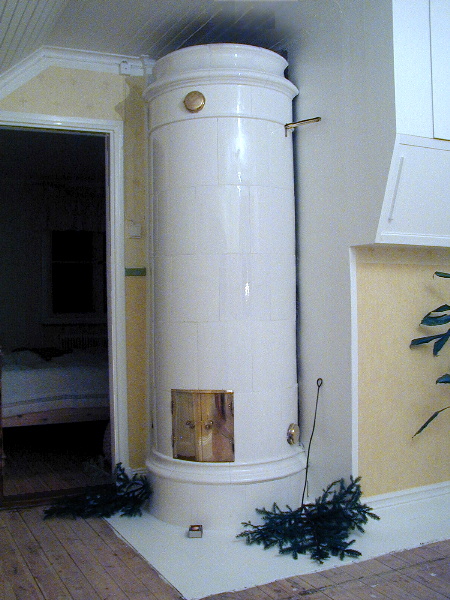
This stove is white, round, a common type from the beginning of the 20'th
century, i.e. it is about 100 years old.
It was originally raised in Uppland, north of Stockholm, now it goes south, to
Södermanland, south of Stockholm.
|
Amount/pcs |
- Material - |
@-price |
Sw
crowns SEK |
||
|
1 piece |
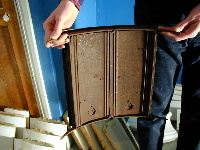
Ceramic oven, used, warm
white, circular form, early 1900, ceramic plates in good
form, i.e. just a few cracks and discolouring, all plates are there.
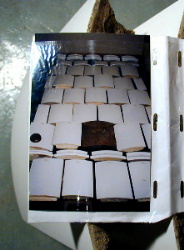
Packed in paper boxes, including a photograph. Was fetched at the
salesman. Including "smith-work", i.e. doors (outer doors in brass and
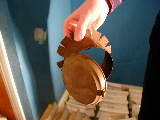
the inner doors in iron plate), the door frame, 3 small sweep openings
in brass and the damper. No connection pipe to the chimney, knobs,
bricks, clay or sand. |
Ca 7000:- |
Ca 7000:- |
||
|
100 pieces |
|
13:-/p |
1300:- |
||
|
66 pieces |
Big bricks 2" (2/3 thickness) for internal walls between channels, damper-roof etc. |
13:-/p |
858:- |
||
|
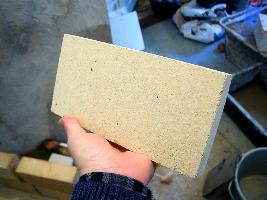
4 pieces |
Fire safe bricks for fireplace (you may use ordinary bricks as an alternative). Length 240 mm Höganäs (Swedish) in our case. |
53:-/p |
212:- |
||
|
3 sacks |
Dry clay in powder form in sacks, 20 kg each sack |
205:-/p |
615:- |
||
|
1 carrier |
Natural sand from a local place, with no stones or humus in it |
100:- |
100:- |
||
|
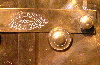
2 pieces |
Draw knobs and a cord for the damper |
xxx |
xxx |
||
|
|
|
|
|
||
|
3 sacks |
Mortar B (concrete and calcium) for the rooms internal walls behind the stove, 25 kg/sack (not for the oven!) |
61:-/p |
183:- |
||
|
4 sacks |
Course mortar for the floor fundament under the stove, 25 kg/sack (not for the oven!) |
61:-/p |
|
||
|
xxx |
Travels, tools, "stos", rails under the stove, pressure proofing by the sweeper etc. |
xxx |
xxx |
||
|
|
Total sum so far (it should be enough!) |
Total 10,268:- SEK |
|||
|
|
Bricks and clay powder was bought in a craftsman shop in Gnesta. All shops do not have big bricks or clay powder at home.... the clay powder is from Bältarbo in Sweden. |
You have to raise it yourself... |
|||
|
|
|
|
|||

|
|
|
|
|
|
|
|
|
|
|
|
|
|
|
|
|
|
|
|
|
|
|
|


|
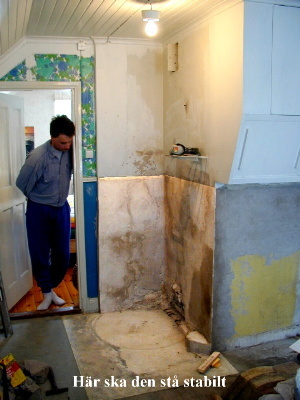
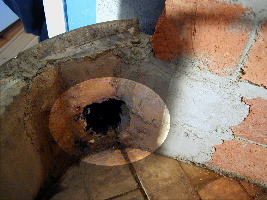
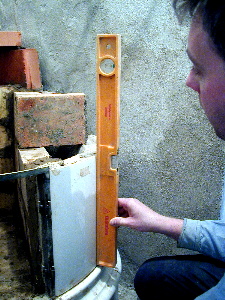
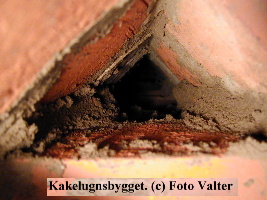
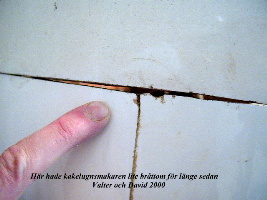
Question: Why is the stove tilting out into the room in the old house? |
|
Answer: |
||||||||||||
|
|
|
|

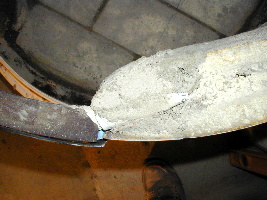
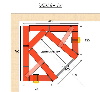
2 - We build the floor level
|
|||||||||||||
|
|
|||||||||||||
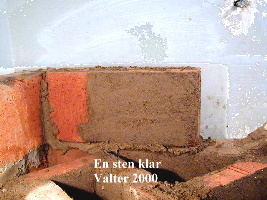
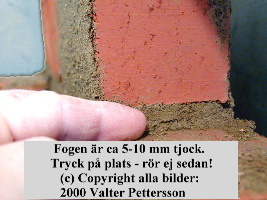
3 – We build the base
|
Beauty |
Faithful |
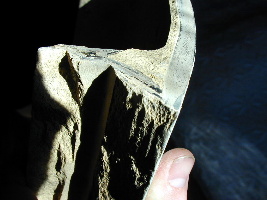
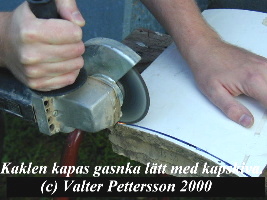
They used to cut them with a tile knife. |
Clay from the field will also do. |
Clay...kladdigt... |
Natural |
|
Mighty |
Cutting. |
|
|
Mixing. |
Love |
|
Solid |
“The sprida trefnad och hygglighet” |
No hollowness, no “boom”. Heavy sound. |
We build upwards. From outside to inside. |
"Put the stove (kakelugnen) down” - about a pregnant woman: give birth to a child. |
Fyr |
|
Great |
Quiet |
Soft |
In my heart |
Blushes |
Fire |
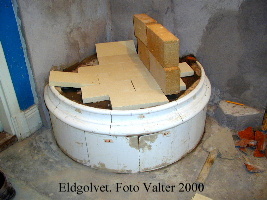
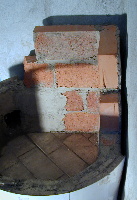
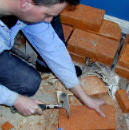
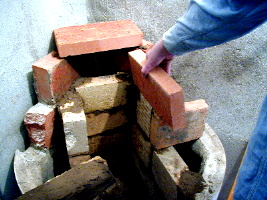
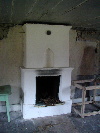
3 – We build the fireplace, the 24’th of March
2000
|
Fire(Eld): |
|
|
|
I
|
|
Sw:
“Tegel, tigel, tighl”, tile (eng.), tuile (fr.): |
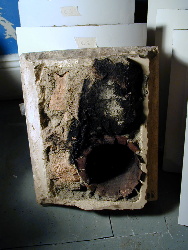
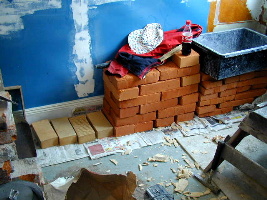
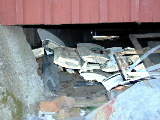
Base is filled with bricks, stones and clay. |
Birch, pine, spruce, rowan (ash), sallow. |
Fire safe bricks, maybe from Höganäs. |
You |
|
Sw:
“Kakel”, Germ. “Kachel” |
|
|
|
And |

|
Water-level on a tile surface? |
We do not
use clips to assemble the tiles to each other. |
?! |
|
Observe
how you SEE your oven when you raise it,
It may be
okay if it leans in or out a little
|
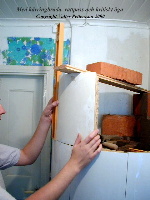
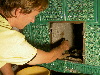
When David
is mounting a tile, he puts the lower edge
Then he
turns it in/up to a vertical position,
Use a rag to hold the edge clean! |
Use good light. Work with clean edges. We have a brick-hammer Protect your eyes! |
|
The base level (A…) should
touch the rooms side walls. |
The edges
of the tiles (white) should be placed
|
Do not hesitate |
The 3’rd of April 2000
|
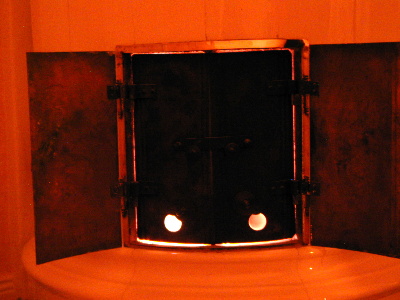
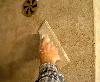
An
aeruginous brass door - |
|
It will lead the gases into
the |
|
|
|
|
|
VP |
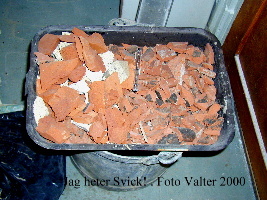
Titta in i min lilla håla! VP |
Tänder vassa varma, |
The 16’th of April
|
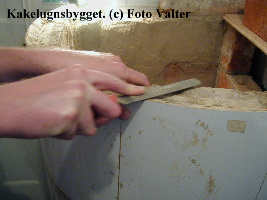
Bricks are adjusted with a
hammer. Ser
ni kursen? |
Checking that it fits in the
tiles back pocket. Why use a brick stone in the
tile pocket? Carefully fill in the clay, |
||||||
|
Straight is beautiful. |
Here is seen a used tile. But done is done – it would
be too much job to |
||||||
|
|
|||||||

|
If you have too little
svick, i.e. a great part of clay,
Much shrinkage = an ugly oven
= a boring evening |
4
– We build the body up to the damper
|
Now we think this way:
|
||
|
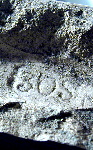
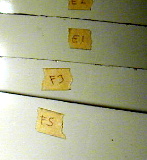
Follow the labels from the disassembly of the
oven. It’s nice if it will remain as it was before, when it was old, fine
or ugly… |
In summer it is too hot to
work.
Then you should make
|
Oxidized,
Scrubby, green, brass door. |
|
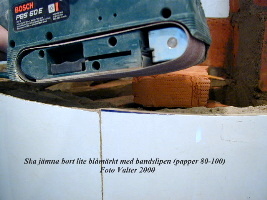
A tile can differ from square ness, and if you
want an even surface and narrow grooves – then you should have squared
tiles (90 degrees) – less than 2 mm difference between the diagonal
measures.
Oh!! Now we’ve got 4 mm … you can use a file
to make it 90 degrees. A hand held grinding
machine will also do (paper 60-80). Be careful to the edges! Motion
into the tile.
Bigger measurements, 1-5 mm, may be grinded
with a rotating “disk grinding” machine. And a file after it. |
Setting the tile 1, then 2, then 3 and so on.
Do as
YOU want. |
Adjusting and setting one level of tiles: 1.Tpick
all tiles for one level. 6.
Set the tiles in clay, 1….6. Check vertically and Alt 1:
Put clay on the tile sides, then put it together with the former tile
(already mounted). Put swick in.
Do you follow me??? |

|
Up to the middle so far |
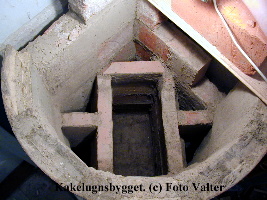
5 channels seen inside |
A little stick prevents my sick |
|
Wet walls (we set them after having set the
outer tiles) |
Rear, left, side channel |
Rear blind channel (no smoking here) |
|
1,2,3…order for setting the tiles – our
order… |
Edges are finished with a file, |
AK - ihavenoideaatalL. |

|
|
|
|
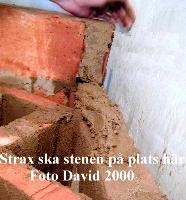
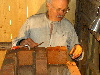
Some pictures from work the 19’th August 2000
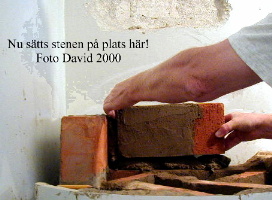
Putting a stone on its place
|
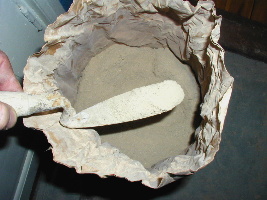
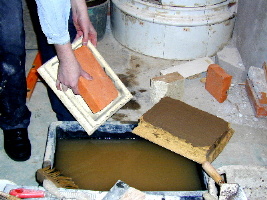
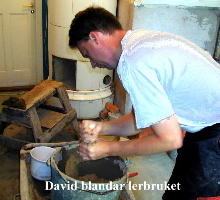
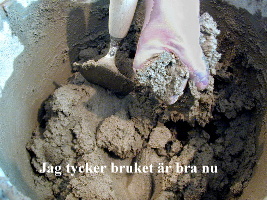
Mixing dry clay-powder (1 part) with dry sand (2-3
parts). Then add water. Mix it. |
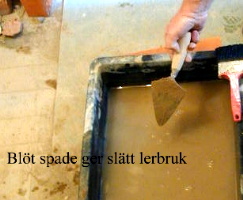
The clay-mix should be rather stiff. It gives little shrinkage when
drying. Shrinkage may lead to deformation, leakage and an ugly oven.
|
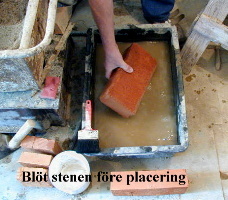
Wet the brick with water before putting clay on it or putting it into
its position. Else it will steel the water in the clay and the clay will
be too hard to be pressed to a narrow distance between the bricks. |
|
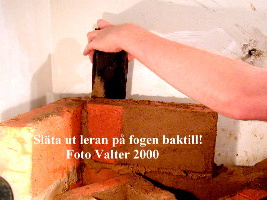
We
put clay on surfaces facing channels and brick-surfaces facing the
living-room. |
With the help of a little water on the tool we make the clay smooth and
tight. |
Before the brick is put into its place, we put some soft clay on the
lower brick. Do not use too little!! |
|
I
put a brick in it’s position against two surfaces, tilt it a little,
push it (not too hard) down (hold the neighbour-brick steady
with your other hand!). The clay swells out on the sides. Wait
for a while (before you make the sides plane), so the water is absorbed
by the bricks – then the clay becomes harder – the stones/bricks will
remain in their right places. |
Removing the extra clay. |
Now this stone/brick is put in its place. |
|
Consideration.
You can easily remove and
reposition some bricks after days or weeks. Only pour a little water on
the dry clay, and remove the brick. This clay you can re-use, just mix
it with the clay in the pot.
That would have been
impossible if you used concrete or lime-mortar. Advise: get rid of that
kind of stuff … it might be good for coating a chimney or making a house
ground with. Or a bridge or an industrial monument. |
It is fun to dig in the sand-box, dig in a clay-pot,
build with blocks and play with fire. |
We use massive bricks (300 mm
length), with no holes in them, well hard-burnt in the factory.
Very old bricks from the old
days have the right measurements, but they may be too old, too soft,
burnt in a low temperature – do not use! For the channels we use bricks with 2/3 of the thickness of the normal bricks.
This kind of bricks are made in Sweden today, and you can order
them from the local shop (in Sweden). For us it was not more expensive
(per volume) compared with modern, standard bricks (240 mm length). |
.JPG)
More pictures the 19’th of August year 2000
|
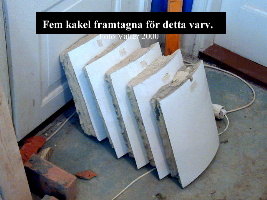
Five tiles arranged for the next level. |
Neatest to look at is a
vertical oven and the joints in a vertical line under each other. |
Look! |
|
|
|
|
|
Here we are! Come winter! |
Five tiles at one level are mounted in clay. Use svick, check
verticality. |
|
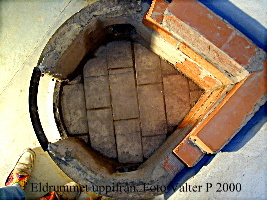
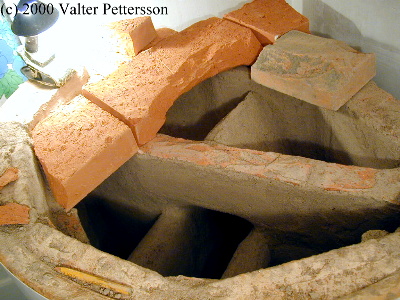
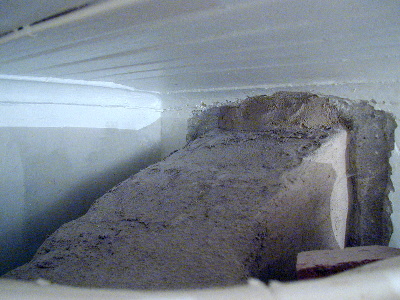
5 – We build the damper level and the damper roof in September 2000
|
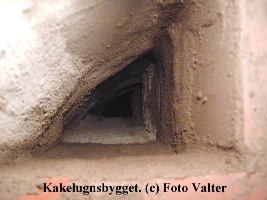
Closest to the observer (you) the hot smoke will turn up-down.
The bricks for the damper-roof are laid out for testing – look at the
cut-out middle brick, there the
smoke will go out through the damper! |
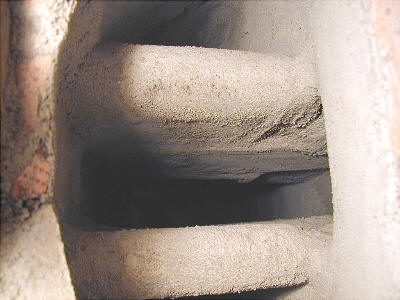
The middle channel in the
picture is for the hot smoke up from the fire. Clay is put on inside
channel walls, for tightening and for smooth surfaces, which will give a
better draught and is easier to clean. |
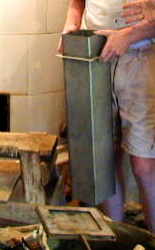
6 – We build the channel in to the chimney
|
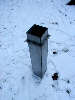
A “hose-stos” made by metal (the flange
is cut away!) It’s
purpose is to prevent smoke leakage – because the oven moves a little
up/down and in/out, and the sheet channel will be perfect in sliding
along the clay and bricks surrounding it. N.B! The flange shall be taken
away, we found a ordinary air channel at Lasses Loppis. |
The final channel into the
chimney channel. |
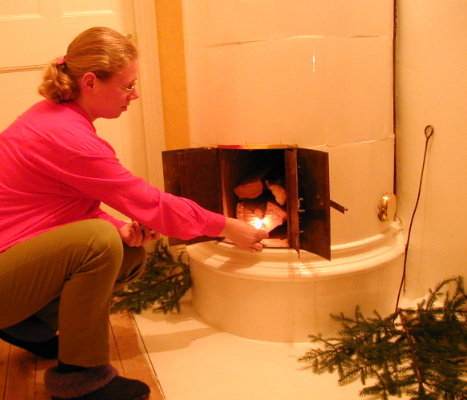
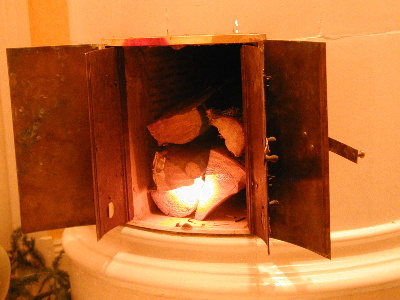
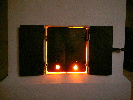
7 - Consecration.
Putting on fire. Heat. Joy. Communion. Rest.
|
A real Christmas Eve! Jenny is lightening the
very first fire. |
|
|
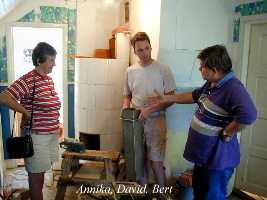
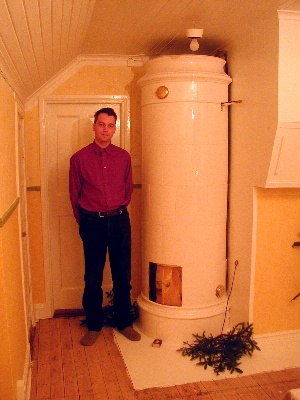
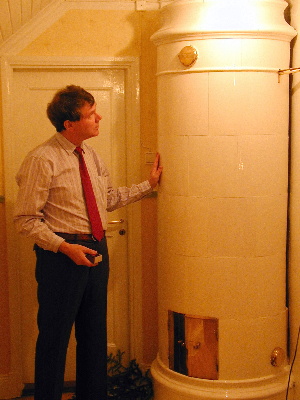
David and his ceramic
stove. |
Valter at his latest
love. |
|
Welcome!
Take on me, think of me, I am your
friend, your quiet flame. |
|
|
The very first fire put
on fire. A resinous stick in the middle. |
The fire burns steady and
quiet, damper is closed to half. |
|
Lonely
|
... with all its
attributes, its cool body, hot mouth - |
|
Från
sol är jag kommen ... here comes the sun… |
…and
transferres into coal and ashes... till kol och aska skall jag bliva |

|
|
||||
|
Visit us!
Old Swedish 'Kakelugnar' Ecomomic woodfireplaces
Visit an old Swedish house
from 1911 in private,
and also have an old fashion Swedish meal.
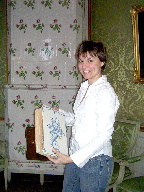
Mr
Valter Isander shows and describes
how to heat a house with Ceramic Tiled Stoves - Kachelöfen - the history, construction, how to raise it, and make a fire in it! Lunch & Coffée included (old fashioned Swedish food will be served to lunch)
Visit
Rönninge (30 km south-west of Stockholm)
All in English
June - September 2007: Reservation/Anmeldung:
Phone
♫
+46 70 572 47 40
+46 8 532 552 28
 |
|
||


©
Copyright 2008
 Valter Pettersson Isander
See also: Ceramic/porcelain stoves – warm and nice (general information in Swedish by Valter)
Send an E-mail to Valter by clicking here!
-Number of visitors since
13'th of March 2004
(id9714):